
DIY Wood World Map

Hello! It's been awhile! And an even longer while since I've shared a DIY project. As I'm sure you've guessed, school is to blame. I have had projects and tests and more projects and my life has been super busy so the blog has been a little neglected. But this past weekend my friend and I decided to tackle a project that we'd always wanted to make but never had the time to do.
I'm sure you've seen these wooden pallet map wall hangings all over Pinterest or at your local craft fairs or on Etsy, and if you have the same mentality as me, thought to yourself, I could make that. And you totally can! Let me show you how.

Step 1: Gather your materials
You will need:
- wood panels
- saw
- pencils
- paint
- paint brushes
- sandpaper
- world map stencil (we printed out a map from Google images)

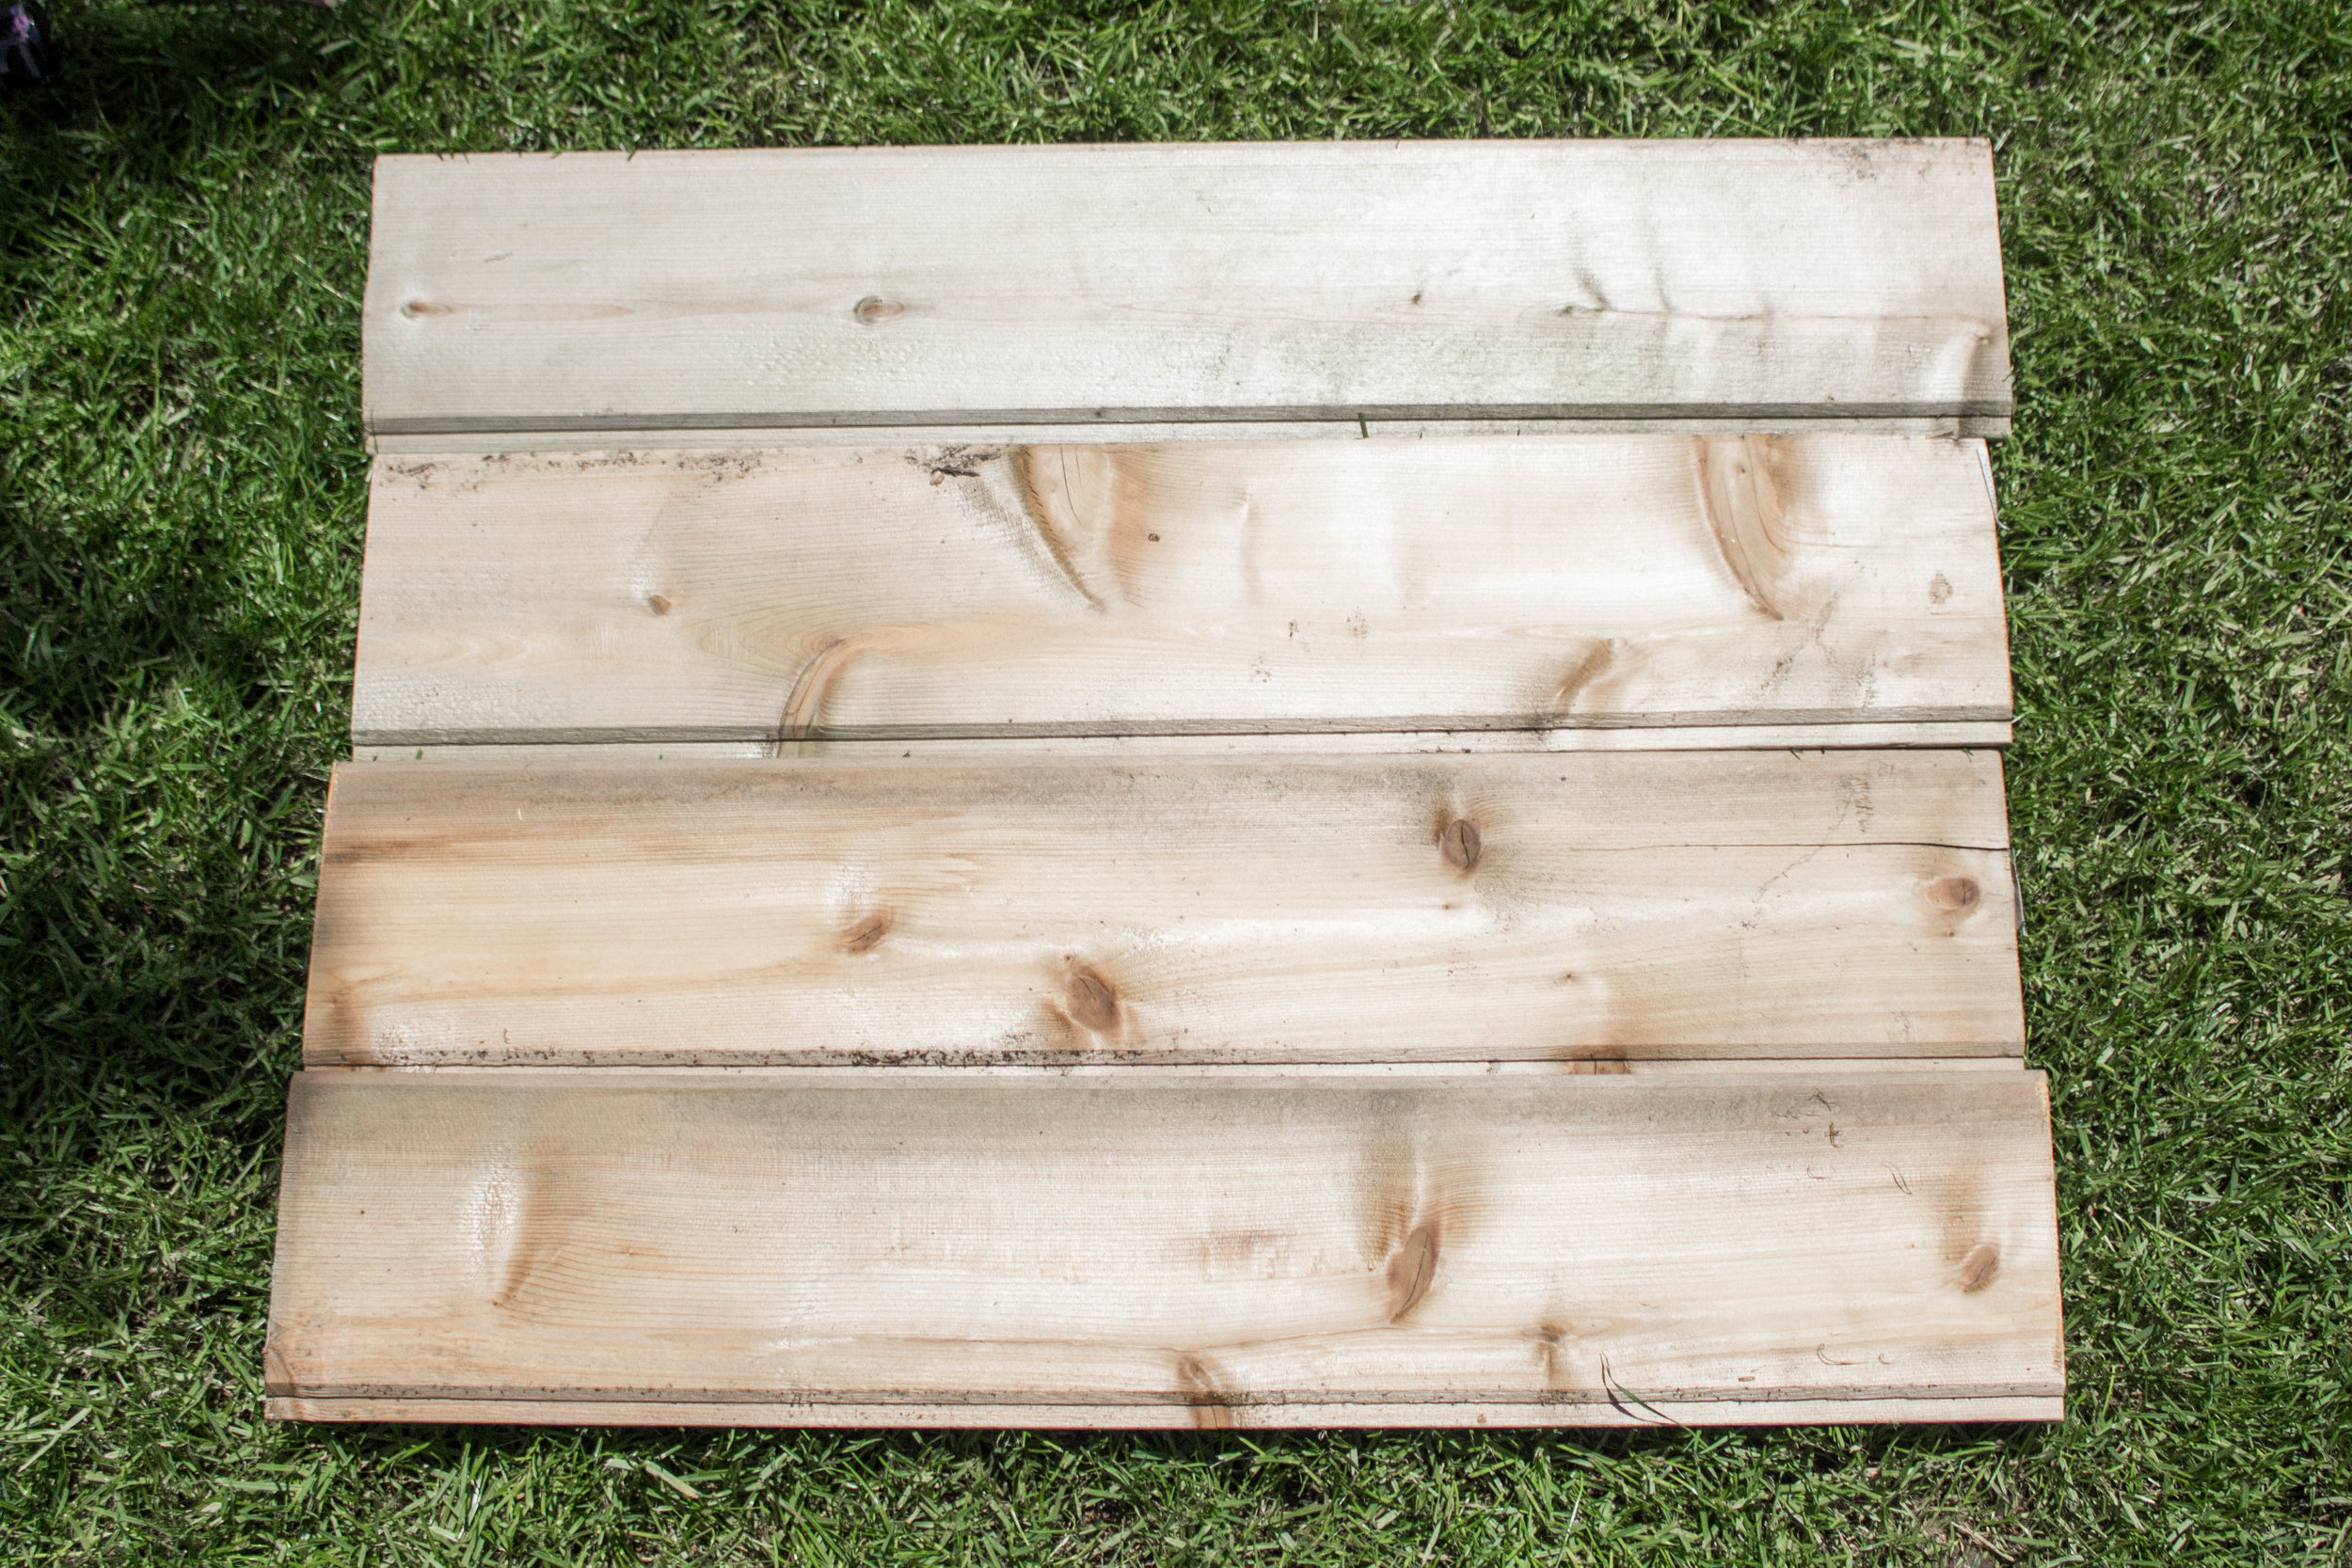
Step 2: Cut and sand your wood and attach the pieces together
We started sawing our wood with a handsaw but my dad and his friend were building an extension onto our deck and happened to have a circular saw. We quickly marked where we wanted our cuts, slid the wood into their pile and had four pieces of equal-ish wood perfect for making our project. Once the pieces were cut we gave them a quick sand to smooth them out and get them ready for paint. We had limited materials available to secure the pieces together so we ended up using hot glue - lots of it - but aren't convinced that this is the most efficient way of connecting them. A piece of reinforcing wood attached at the back would probably add a lot of stability and make sure the project doesn't fall apart.
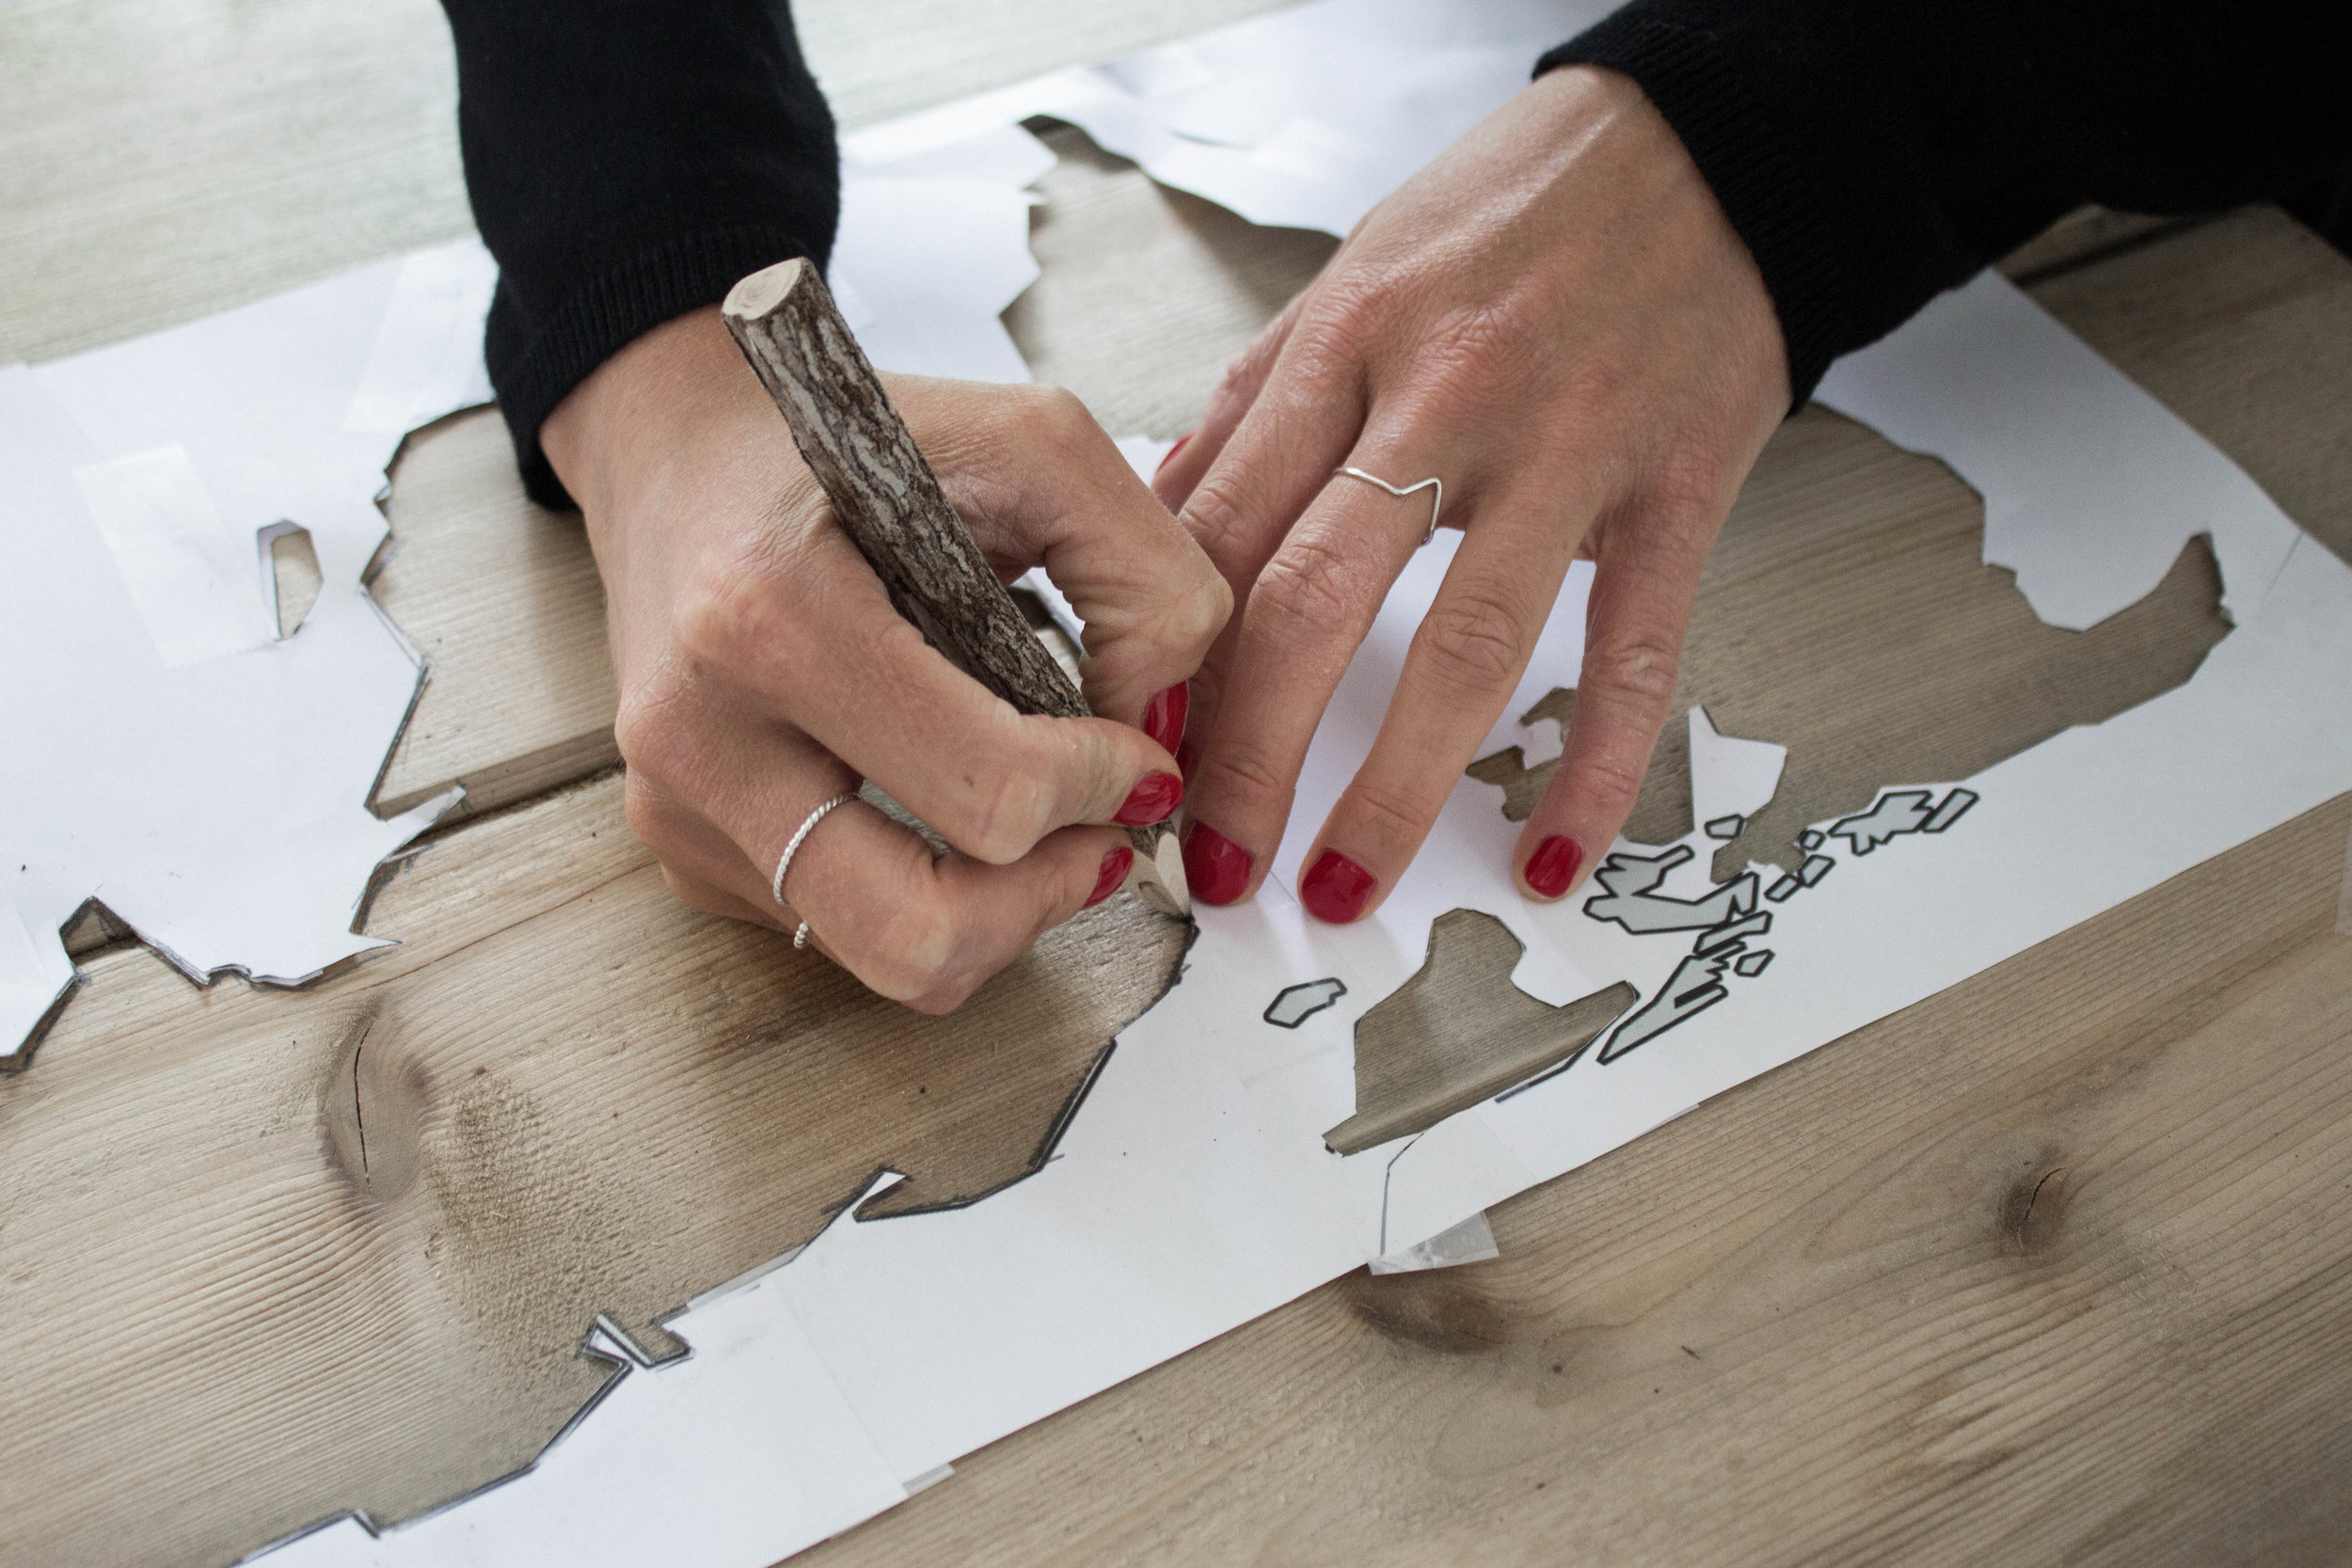
Step 3: Cut out the stencil and trace it onto the wood
This part was tedious but is pretty much the most important part.

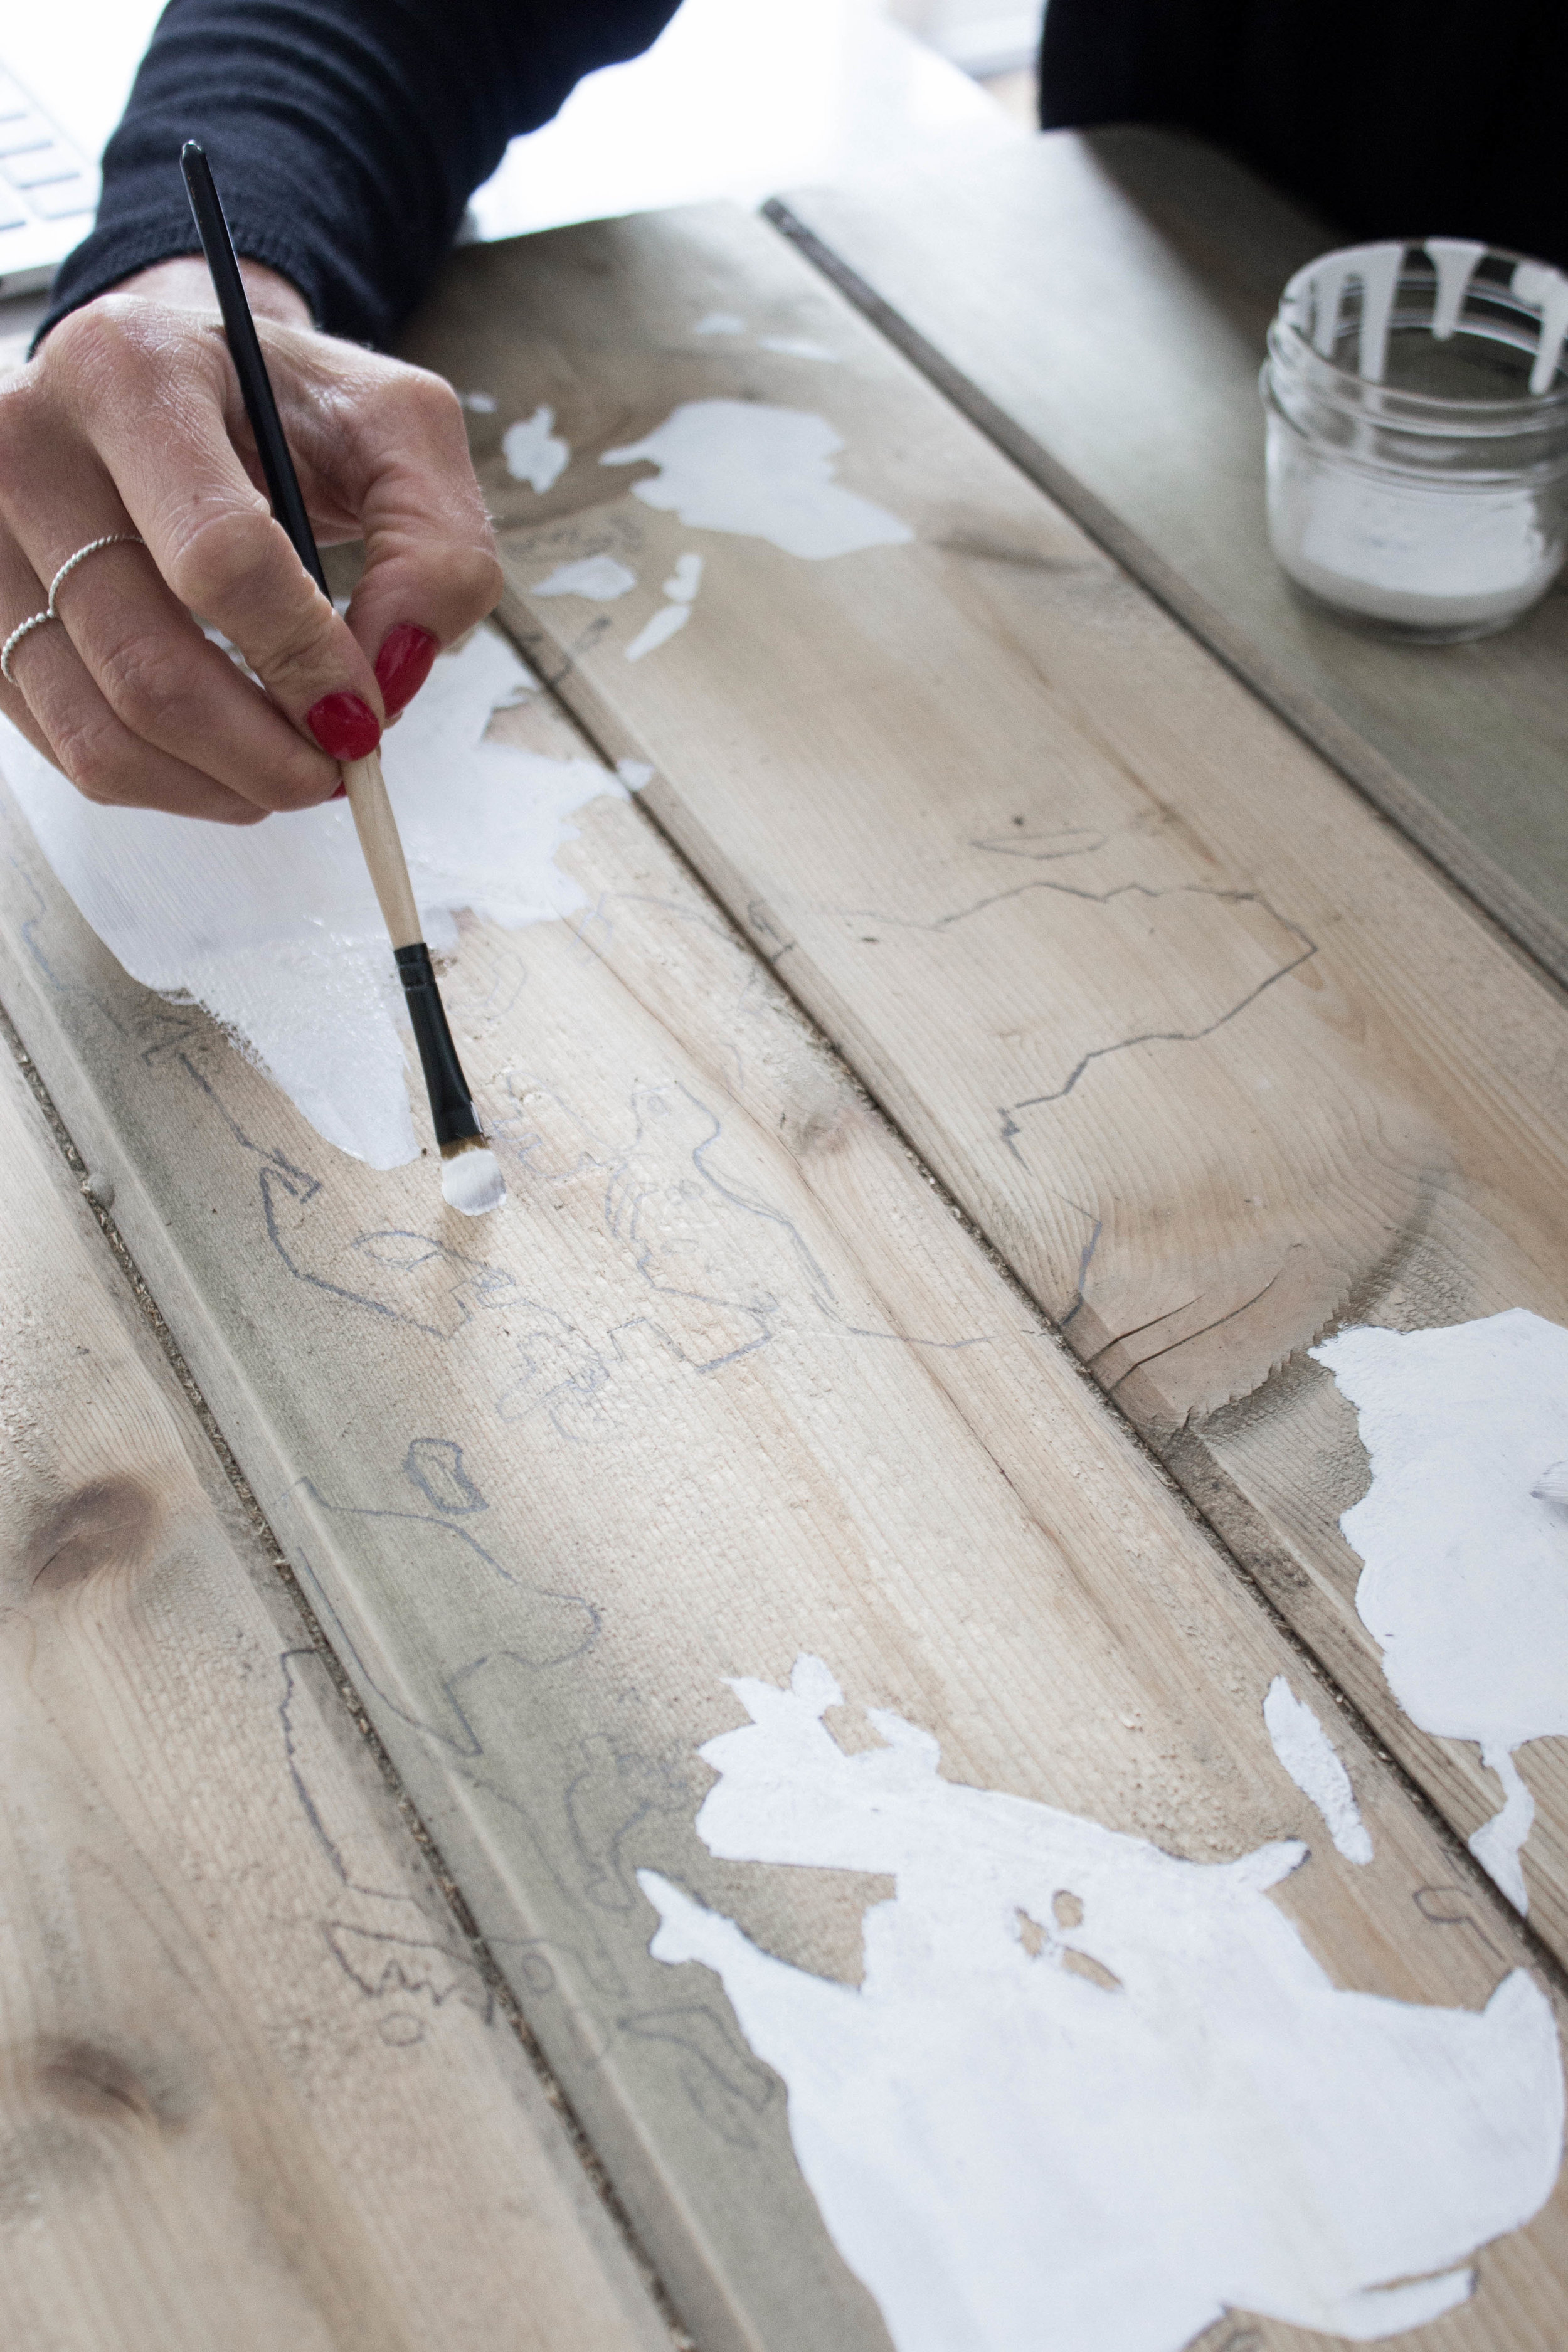
Step 4: Paint in the map
We chose to do it in white because it makes the design pop and keeps the map neutral enough to be put up in any space. This part is pretty self-explanatory but my only tip is to start on the edges to keep them clean and work your way in.

Step 5: Add your words
We chose the phrase "our adventures await" and wrote them out first by hand then painted over them with black. Unlike the map we painted the middle parts first then cleaned up the edges at the end.


Have you ever made one of these wood world maps? It was definitely a lot of work but saved us over $100 and made for a super fun afternoon!