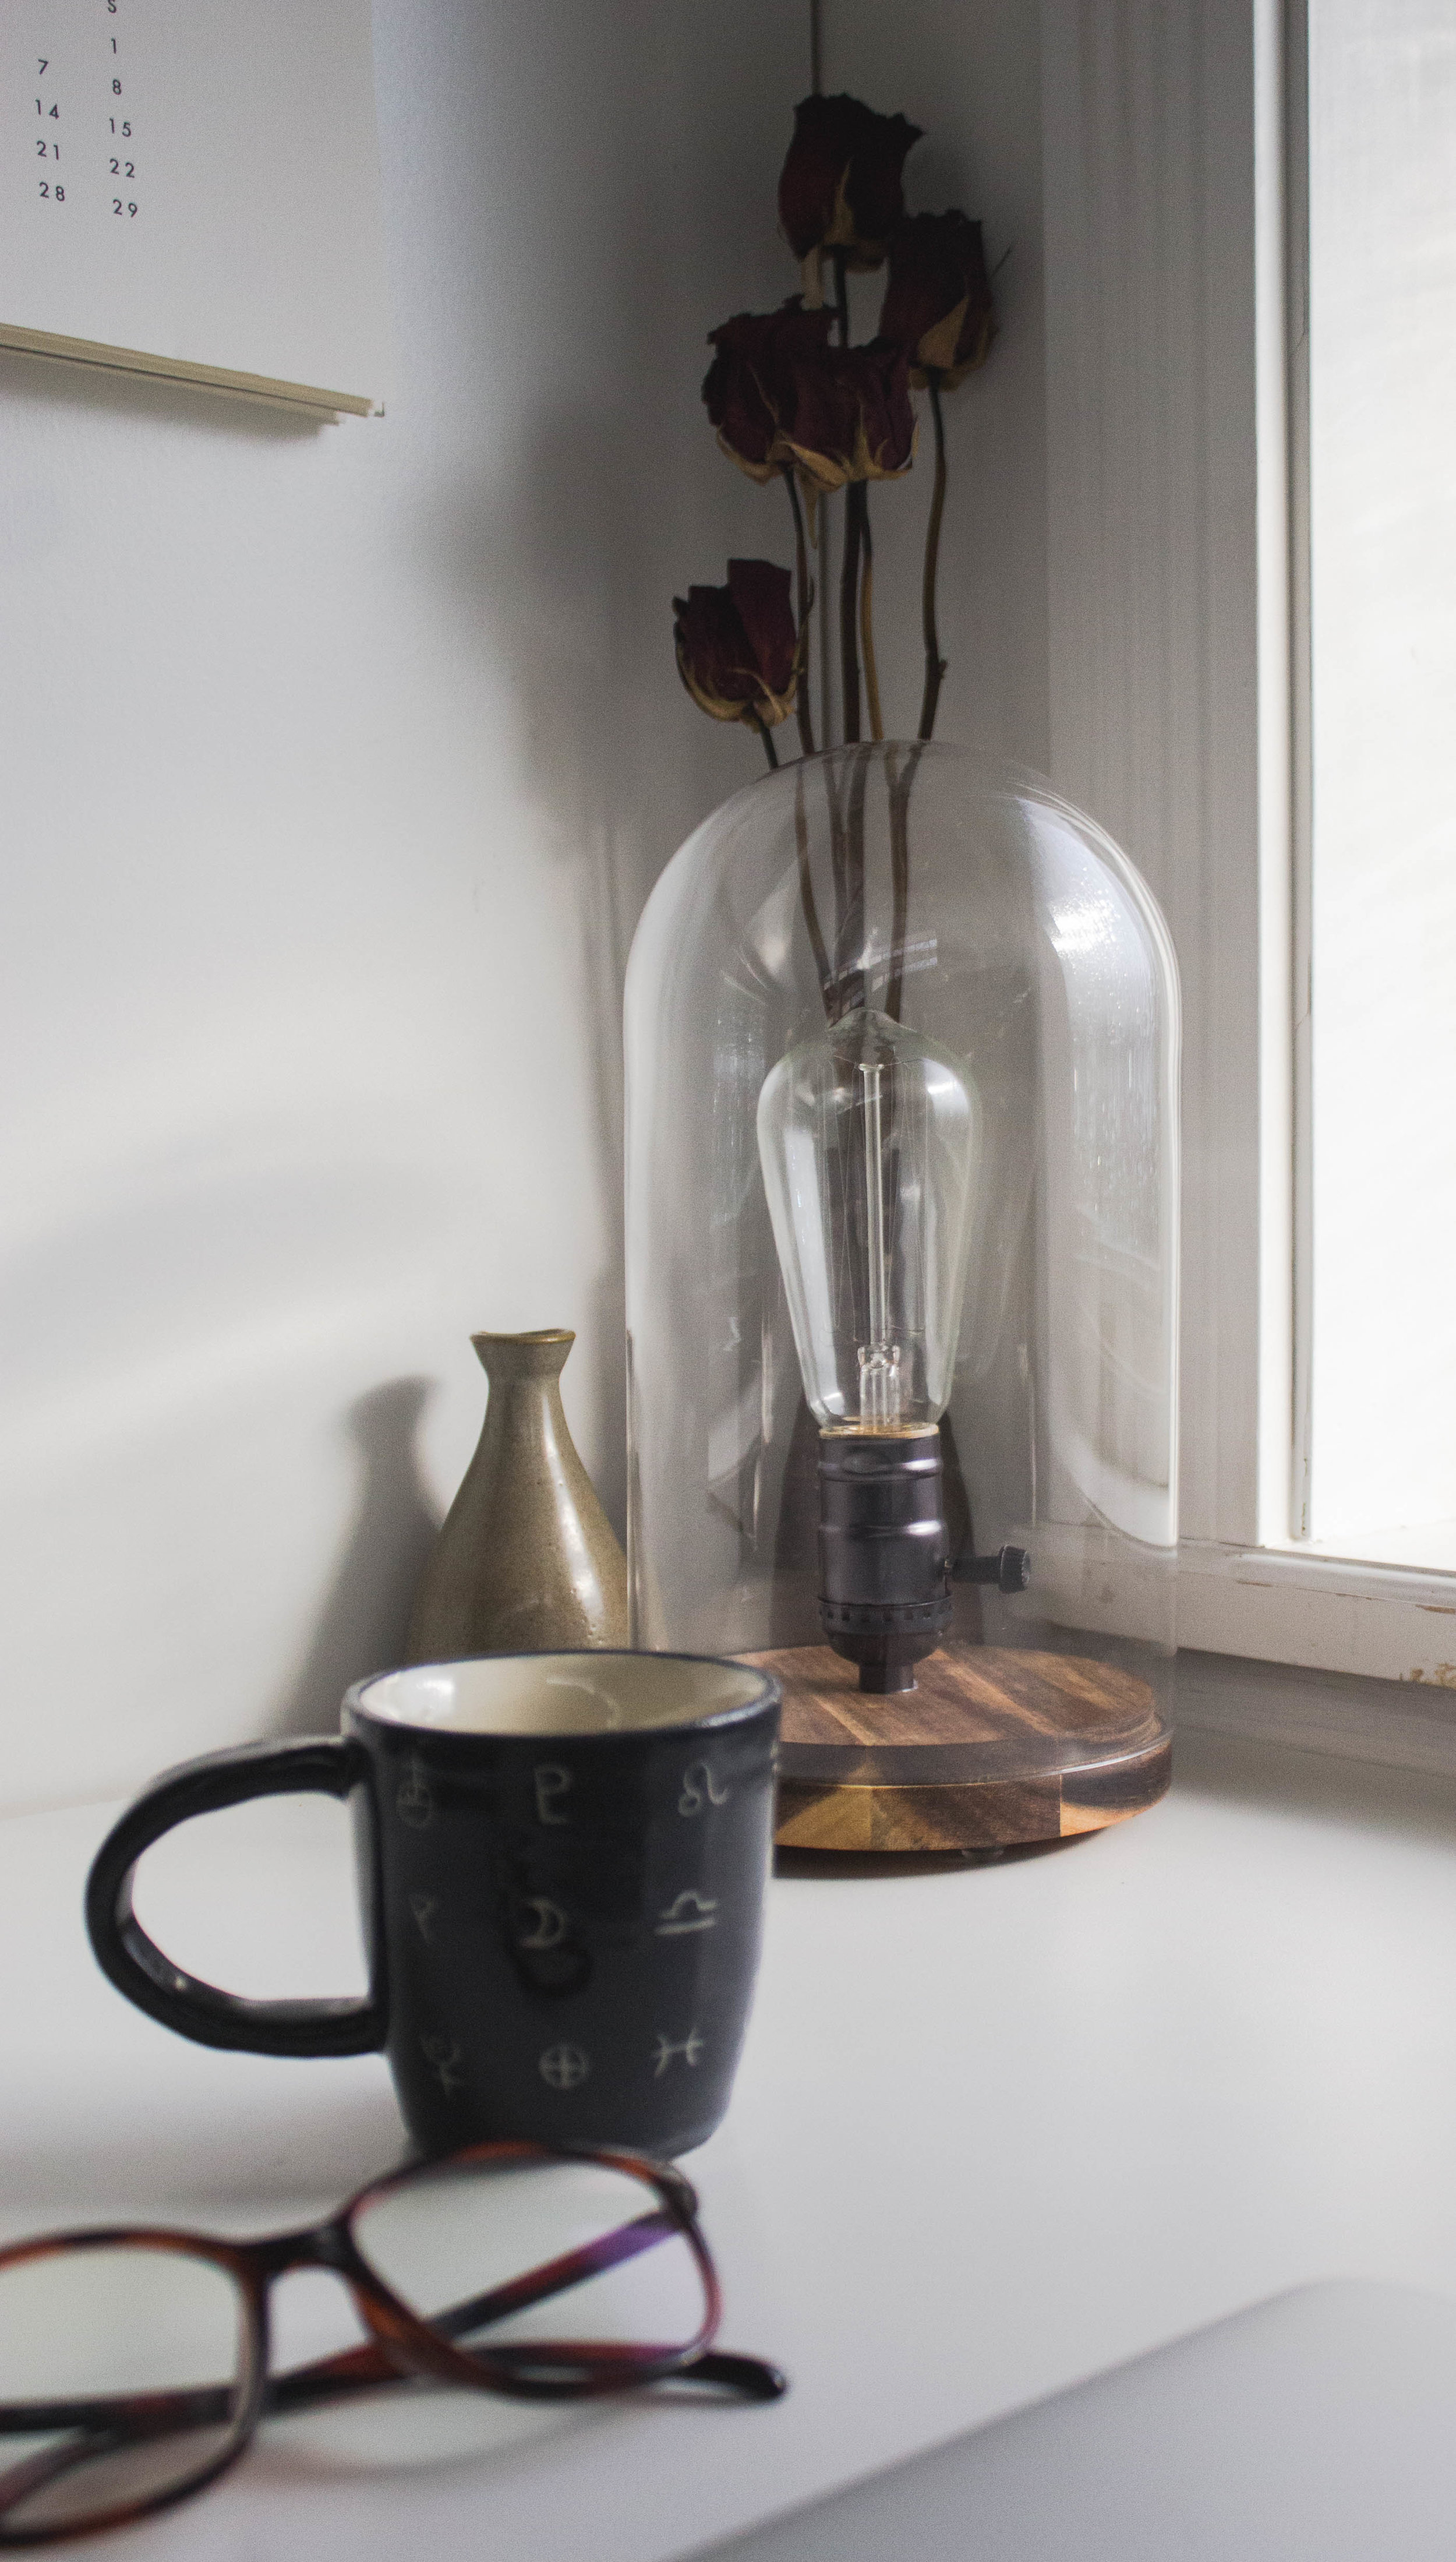
DIY Old Faithful Inspired IKEA Hack Lamp
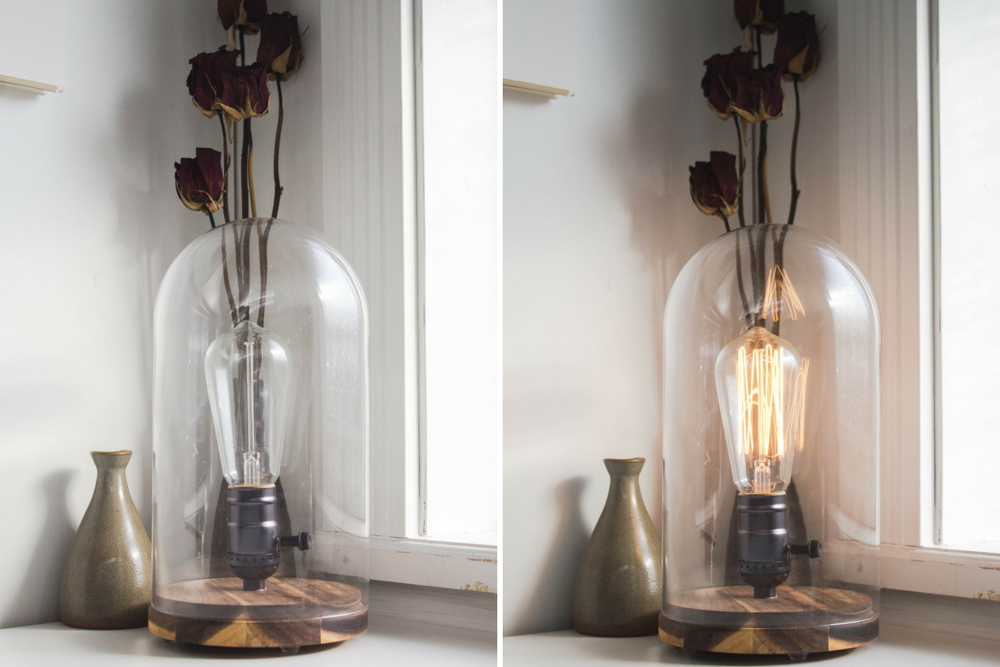
A couple of years ago I was wandering through the streets of Gastown in Vancouver and came across a shop called Old Faithful. It was full of beautiful things like plants, homeware, magazines, candles, chocolate, tea, and lots more. One of my favourite things was this amazing bell jar lamp. It was way out of my budget so I decided to try to recreate it. And I kind of did. But I was never really all that thrilled with it. Sure it looked fine but it wasn't really what I wanted. So a couple of weeks ago I decided I would give it another go. To say I'm happy with how it turned out is a major understatement. I'm absolutely thrilled! And it doesn't hurt that I saved myself over $100! Keep reading to find out how to make your own Old Faithful inspired lamp using the Ikea HÄRLIGA glass dome with wood base and a few other materials you can pick up at your local hardware store.

Materials
- HÄRLIGA glass dome with wood base
- Light cord
- Socket
- Socket cover
- Screwdriver
- Drill
- Drill Bits
- Vinyl pads (not pictured)
- Hot glue gun (not pictured)
- Edison style light bulb (not pictured)
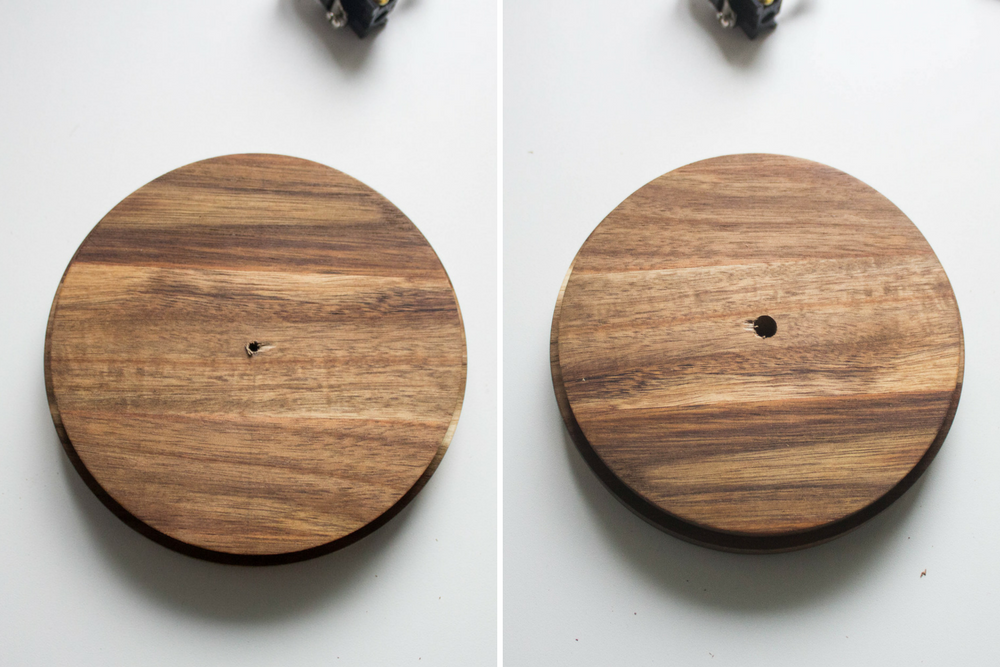
Step 1: Find the centre of the wood base and drill a hole just large enough to fit your cord
There are a few ways you can do this: eyeball it. Take a wild guess and just mark where you think the middle is. It’s less precise but it’s your lamp so you do you! Another way to do it is to find the middle using some basic geometry. I used this video tutorial for finding the exact middle and made all my marks on the bottom of the wood so you wouldn’t see the lines on the top.
Once you’ve found the middle, drill your hole. Start with a small drill bit and gradually work your way up to the larger ones. This will ensure that your wood doesn’t split and lets you test to see if your wires fit as you go.

Step 2: Feed the wires through the drilled hole
Once you have your hole drilled, feed the wires through it. You want to have enough room to allow the wires to move somewhat freely but not so much space that the socket cover slides through.


Step 3: Connect the cords to the socket and assemble the socket cover
I feel like this goes without saying but, make sure your lamp cord is NOT plugged in. Slide the bottom half of the socket cover over the wires. Connect the wires of your cord to the corresponding ends of your socket. How you do this will vary from socket to socket but basically you’ll want to connect the negative to the negative and the positive to the positive. Make sure there’s good contact between the wires and the base and you should be good to go. Once the socket is connected to the cord and fit comfortably into the bottom of the socket cover, slide the top half of the socket cover overtop, snap it together and secure it with the screw it came with (if it came with one, not all will).
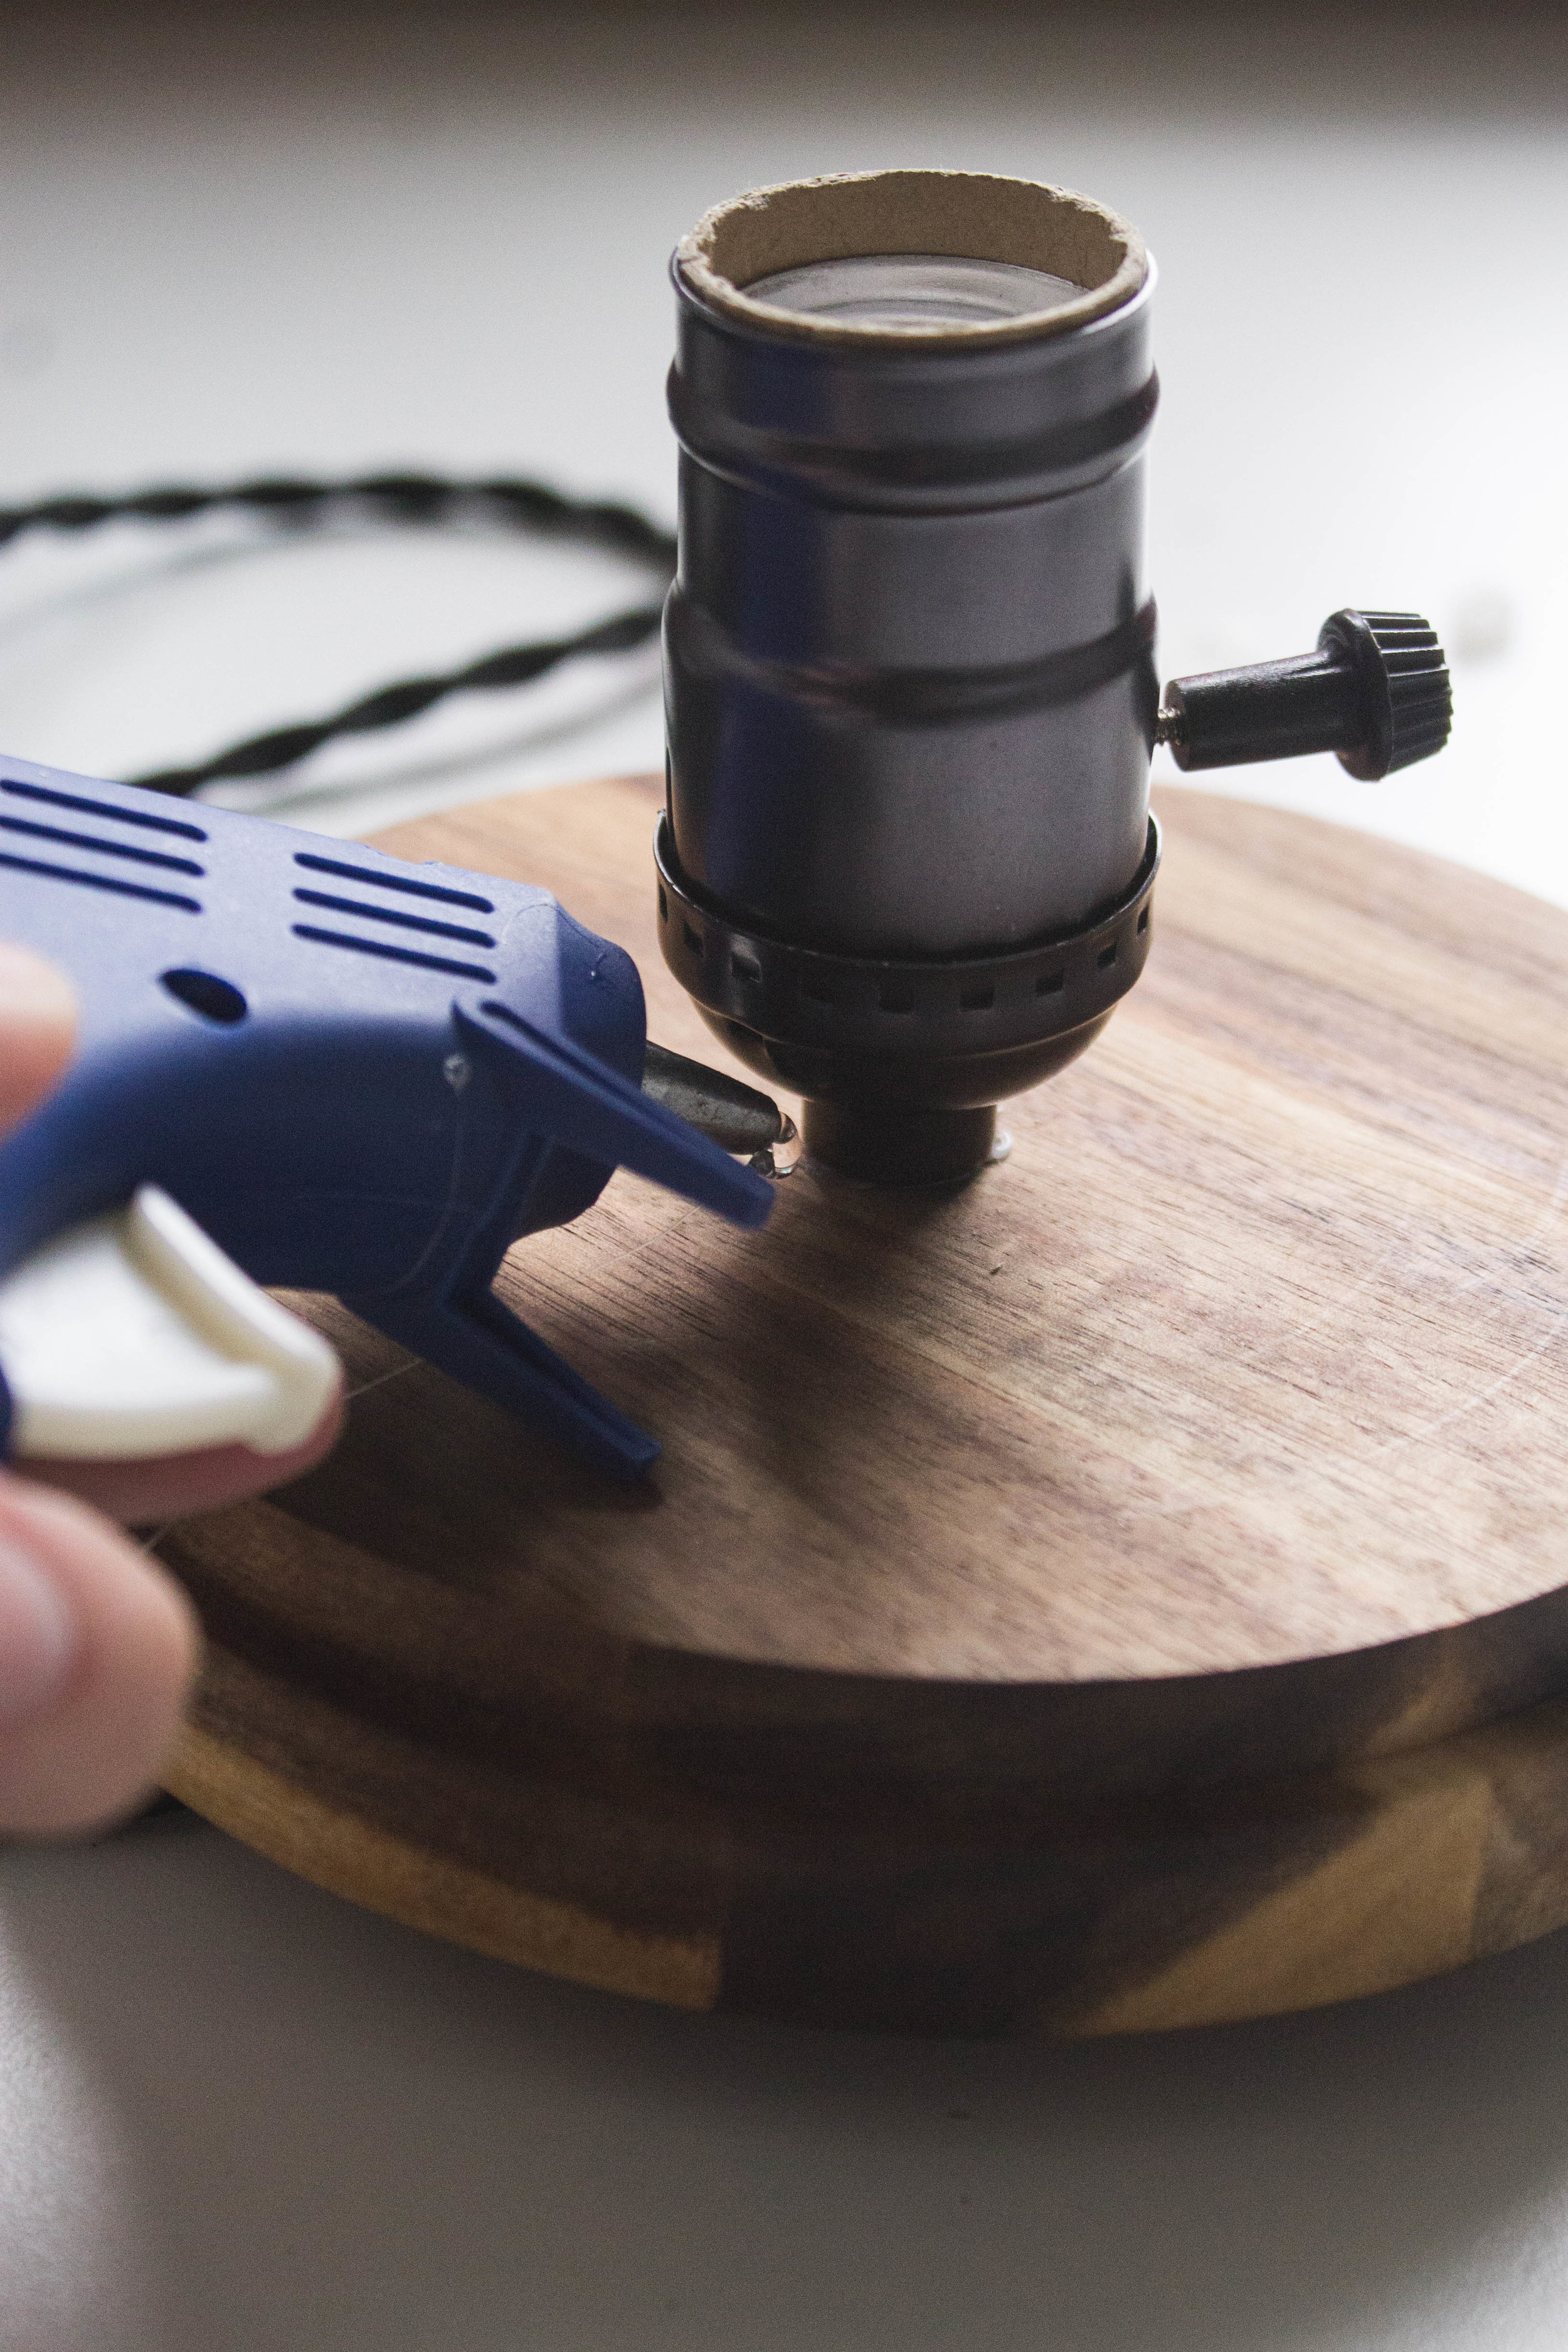
Step 4: Secure the base of the socket cover to the wood base with a bit of hot glue
This step is technically optional but I think it’s pretty essential. Add a little bit of hot glue to the base of the socket cover to secure it and make it a bit sturdier. This will help reduce stress on the cord and wires and make sure that the light bulb is less likely to fall over and break.

Step 5: Attach vinyl pads to the bottom of the wood base
To make the base of the lamp taller and to prevent it from resting on the lamp cord, attach vinyl pads to the bottom of the wood base. I bought an assorted pack and used the flat ones first then added the slightly rounded ones on top to give it extra height.

Step 6: Screw in bulb
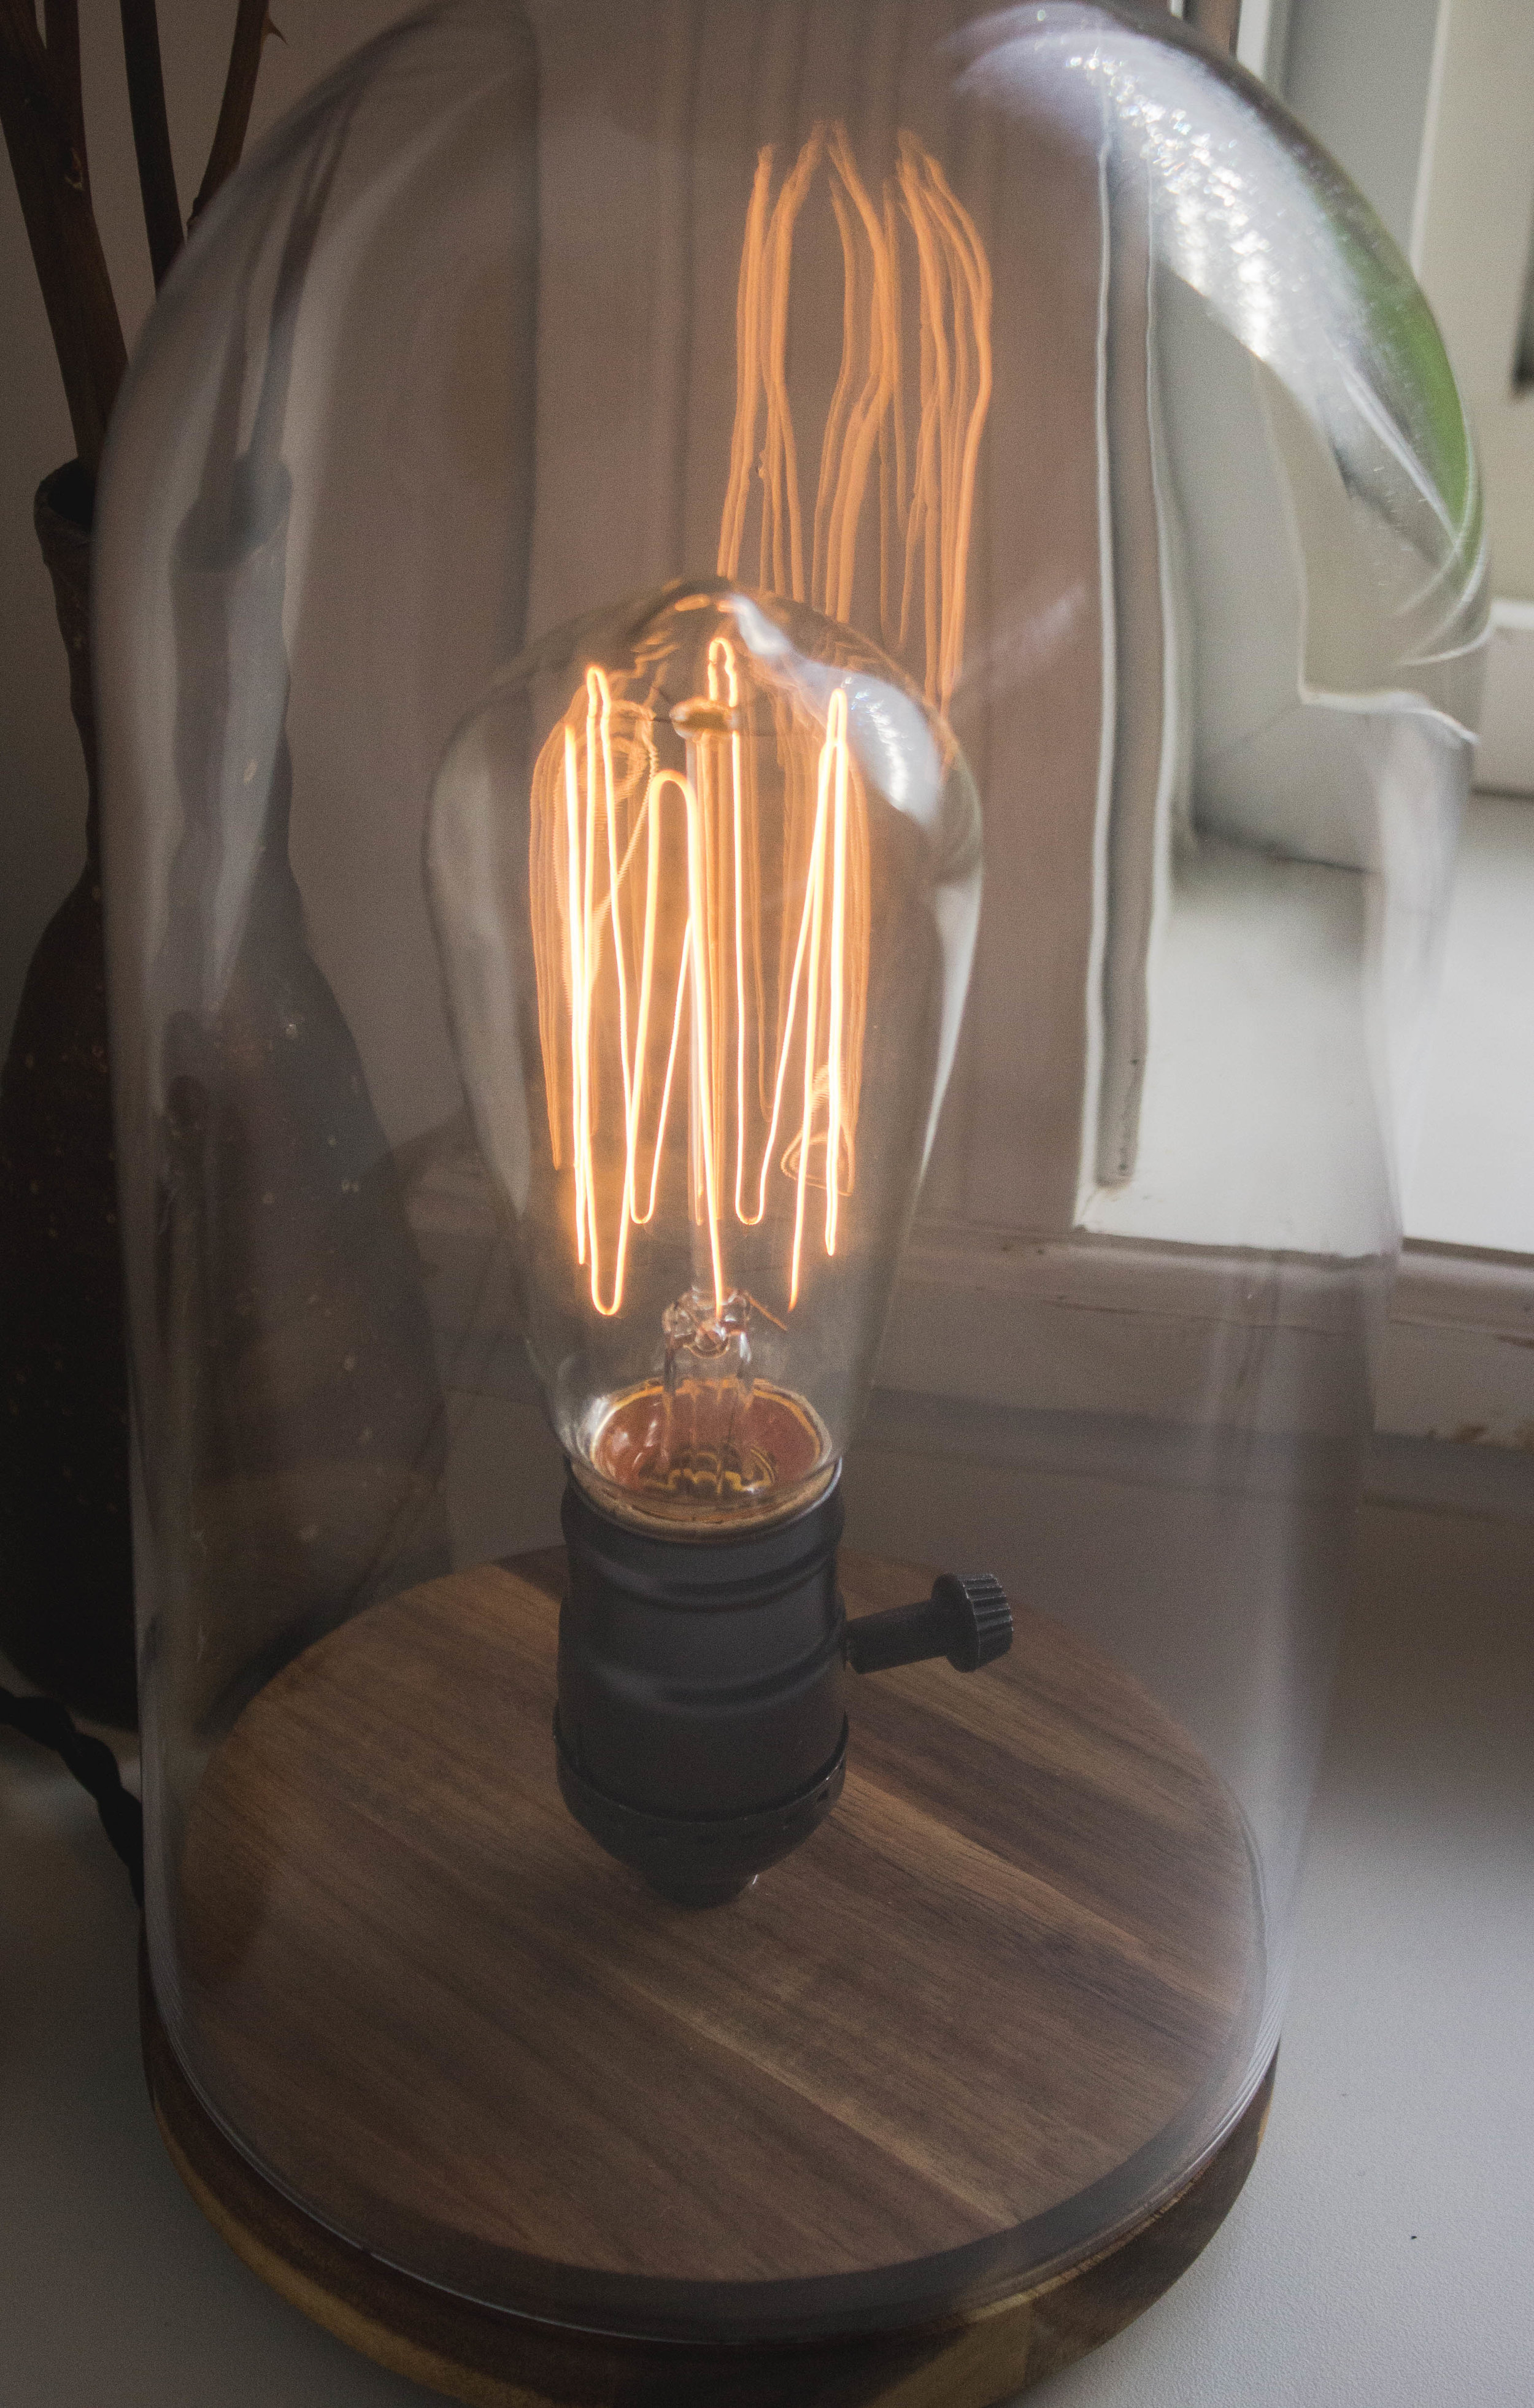
Obviously you can use whatever kind of bulb you like but for the full effect I recommend an Edison style bulb to create a more industrial, rustic, vintage look.
Step 7: Plug in the lamp
Once you’ve got it all assembled, the glue has dried, and the bulb is screwed in, it’s time to take in the full effect of your lamp! Set it in a cozy corner, surround it with flowers or candles, and appreciate your handy electrical work!