
DIY Thanksgiving Center Piece
Thanksgiving Center Piece
diy thanksgiving center piece
DIY thanksgiving center piece

IMG_3541
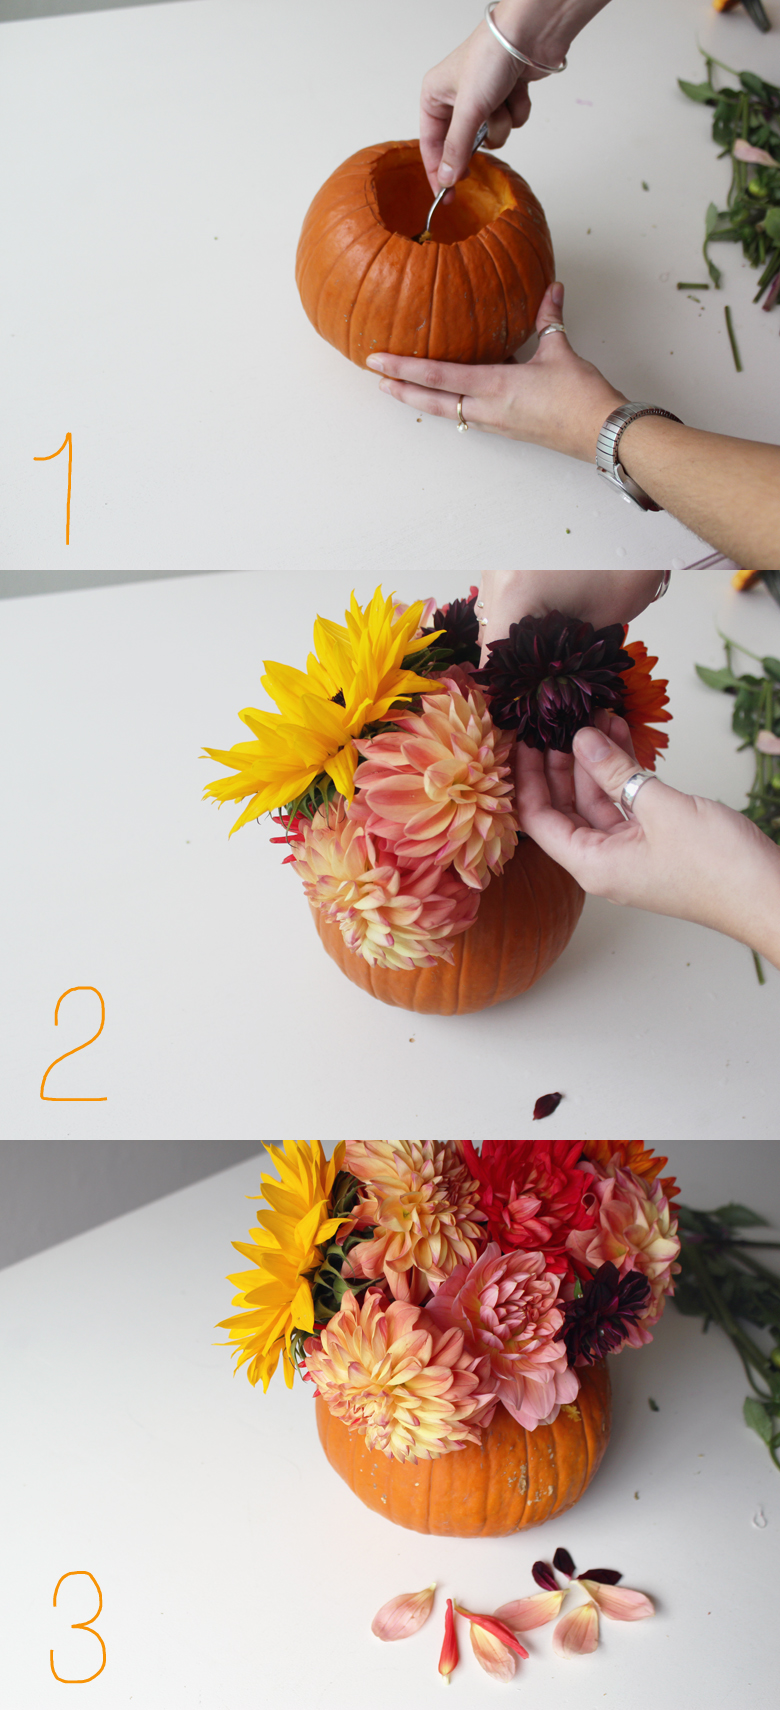
With Thanksgiving coming up this weekend in Canada I thought I'd share a little DIY for making your table a little bit brighter. There are so many flowers right now that complement the colours of fall and putting them in a pumpkin just makes them that much more autumnal! Materials:
- pumpkin (I used a pumpkin pie one instead of a carving one because they were smaller and the insides come out really easily)
- flowers
- knife
- bowl
- spoon
- tin can
- floral tape (optional)
Method:
- Trace the can onto the top of the pumpkin so you know how wide to make the opening.
- Cut the top off following your trace marks.
- Scoop out all the guts and seeds - separate the seeds from the guts and save them to make roasted pumpkin seeds (recipe coming soon!)
- Fill the can with water and the plant food and place it in the pumpkin.
- Cut the stems of the flowers so they are slightly taller than the can.
- Arrange the flowers in the can so that you can't see the can and they sort of spill over the sides of the pumpkin.
- Place it in the center of your table and admire how beautiful it is!
Tips:
- remove the leaves
- use floral tape to hold the center three or four flowers together so they hold their shape, but place the rest of the flowers around them however you like
- I've heard that spraying the inside of the pumpkin with hairspray can help preserve the pumpkin but if you plan on having candles on your table, I'd advise against the hairspray. If you make the centerpiece within two days before Thanksgiving, you shouldn't have to worry about rot.